5. Part 3: Publishing & Portability
In this part, we'll make our workflow production-ready by publishing organized outputs, supporting multiple filesystems, and containerizing dependencies for reproducibility.
5.1 Workflow outputs
Great! We have a workflow that (arguably cruelly) collects our cats into "good" and "bad" groupings! Unfortunately, the final output file is still deep in the work directory in a hostile-looking hash-addressed directory. We'd like to define some final workflow outputs that should be published somewhere safe, outside of the work directory.
5.1.1 Understanding workflow output blocks
To define the workflow outputs, we'll need to define a publish: block in the workflow.
We'll also need to put the existing workflow in a main: block as shown below:
5.1.2 Publishing the collage
In the publish: block, we define channels that we'd like to publish:
Now when we run, the final collage will be copied into results/collage_all.png.
We can control the publication mechanism by adding arguments.
The mode 'copy' directive tells Nextflow to copy the output file rather than create a symlink (the default).
5.1.3 Publishing the classifications
The more interesting outputs might be those with more metadata associated with them. For example, we might want to record the classification for each image ID. To publish metadata-rich outputs, we'll first create a channel that is composed of Maps:
This will cause the resized images to also be published in the results directory, but it's looking a bit cluttered now:
results
├── collage_all.png
├── resized-4skdDxHm4yDsSJIr.png
├── resized-4y6Hyu0uzVZcEx89.png
├── resized-6Nb0ipGrHDHqCEmZ.png
└── resized-wfMCf1lHc9YPw455.png
5.1.4 Organizing outputs with path directives
Let's bring a little bit of order by organizing images into subdirectories by their label:
| Organized output | |
|---|---|
Now our results are organized:
results
├── collage_all.png
└── images
    ├── good_cat
    │   ├── resized-4skdDxHm4yDsSJIr.png
    │   └── resized-wfDuHvt6VIn2tM8T.png
    └── bad_cat
        ├── resized-6Nb0ipGrHDHqCEmZ.png
        └── resized-wfMCf1lHc9YPw455.png
5.1.5 Creating index files
Now we sanitized the label names so that they'd be in more sensibly named directories (no spaces, etc), but this risks corrupting that metadata. Let's ask Nextflow to publish a more digestible samplesheet or "index" of the published outputs, that includes the real, unsanitized labels:
| Output with index | |
|---|---|
This produces a CSV at results/images/cats.csv.
For more structured data, you can also choose YAML or JSON:
| JSON index | |
|---|---|
Run the workflow to see the organized outputs:
5.1.6 Takeaway
Nextflow's output publishing system allows you to organize results with custom paths and generate index files that preserve important metadata.
5.1.7 What's next?
Let's make our workflow portable across different storage systems.
5.2 Filesystem independence
Nextflow speaks many different communication protocols, allowing you to seamlessly move from using data on a local or shared filesystem, to http:///https://, to object storage protocols like s3://, az://, gs:// or even older ftp:// protocols.
You can provide support for new protocols yourself via Nextflow's plugin system.
5.2.1 Using remote files
For example, our current workflow uses a local model file. But we can easily switch to using a remote model from the web:
Nextflow will automatically download the file and make it available to the process. This works for input files too - you could provide image URLs instead of local paths!
5.2.2 Cloud storage support
Similarly, if you're working in the cloud, you can use cloud storage URLs:
# AWS S3
nextflow run main.nf --model s3://my-bucket/models/b32_400m.pt

# Google Cloud Storage
nextflow run main.nf --model gs://my-bucket/models/b32_400m.pt

# Azure Blob Storage
nextflow run main.nf --model az://my-container/models/b32_400m.pt
Tip
To use cloud storage protocols, you'll need to configure appropriate credentials for your cloud provider. See the Nextflow documentation for details.
5.2.3 Takeaway
Nextflow's protocol flexibility makes workflows portable across local, web, and cloud storage systems without code changes.
5.2.4 What's next?
Let's containerize our workflow to ensure it runs reliably anywhere.
5.3 Containerization
All of our Nextflow tasks are currently using the software installed on the host operating system. This practice can quickly become a problem for you for a number of reasons:
- As the workflow grows, and the number of software dependency stacks will also likely grow, and it becomes increasingly likely that the installation of one piece of software accidentally updates a dependency of another piece of software. Similarly, you may end up with incompatible software dependency stacks.
- The analysis becomes tied to a very specific machine or infrastructure, difficult to reproduce in exactly the same way elsewhere (by yourself or by a colleague).
- Managing software is a thankless and boring task.
5.3.1 Understanding containerization
Containers are lightweight, standalone packages that include everything needed to run a piece of software: code, runtime, system tools, and libraries. Docker is the most popular container technology, and it works by packaging your software and dependencies into an "image" that can run consistently anywhere Docker is installed.
When you run a containerized task, Docker creates an isolated environment with exactly the software versions specified in the container image, completely independent of what's installed on the host system. This ensures that your workflow produces identical results whether you run it on your laptop, an HPC cluster, or in the cloud.
5.3.2 Container technologies in Nextflow
Nextflow provides the opportunity to run each task in an isolated software environment, and can do so via a variety of technologies, including:
- conda
- containers (docker, apptainer/singularity, charliecloud, sarus, shifter, and podman)
- spack
Let's improve the reproducibility and portability of our workflow.
5.3.3 Containerizing processes
You'll remember that we manually installed software two different ways:
- imagemagick (via
apt-get install), and - python packages (via
uv sync)
We could use a single container for all of the steps in the workflow, but this might limit the reusability of the containers, and upgrading one piece of software for one task would mean changing the container for all of the tasks. Most researchers prefer (and Nextflow supports) defining a container per-process.
To replace the imagemagick we installed via apt-get, we'll use the public container minidocks/imagemagick:7.
We've already talked about the memory and cpus process directives, but another useful directive is the container directive.
We'll use this to add the container to our Resize, Collage, and CombineImages processes:
5.3.4 Building custom containers
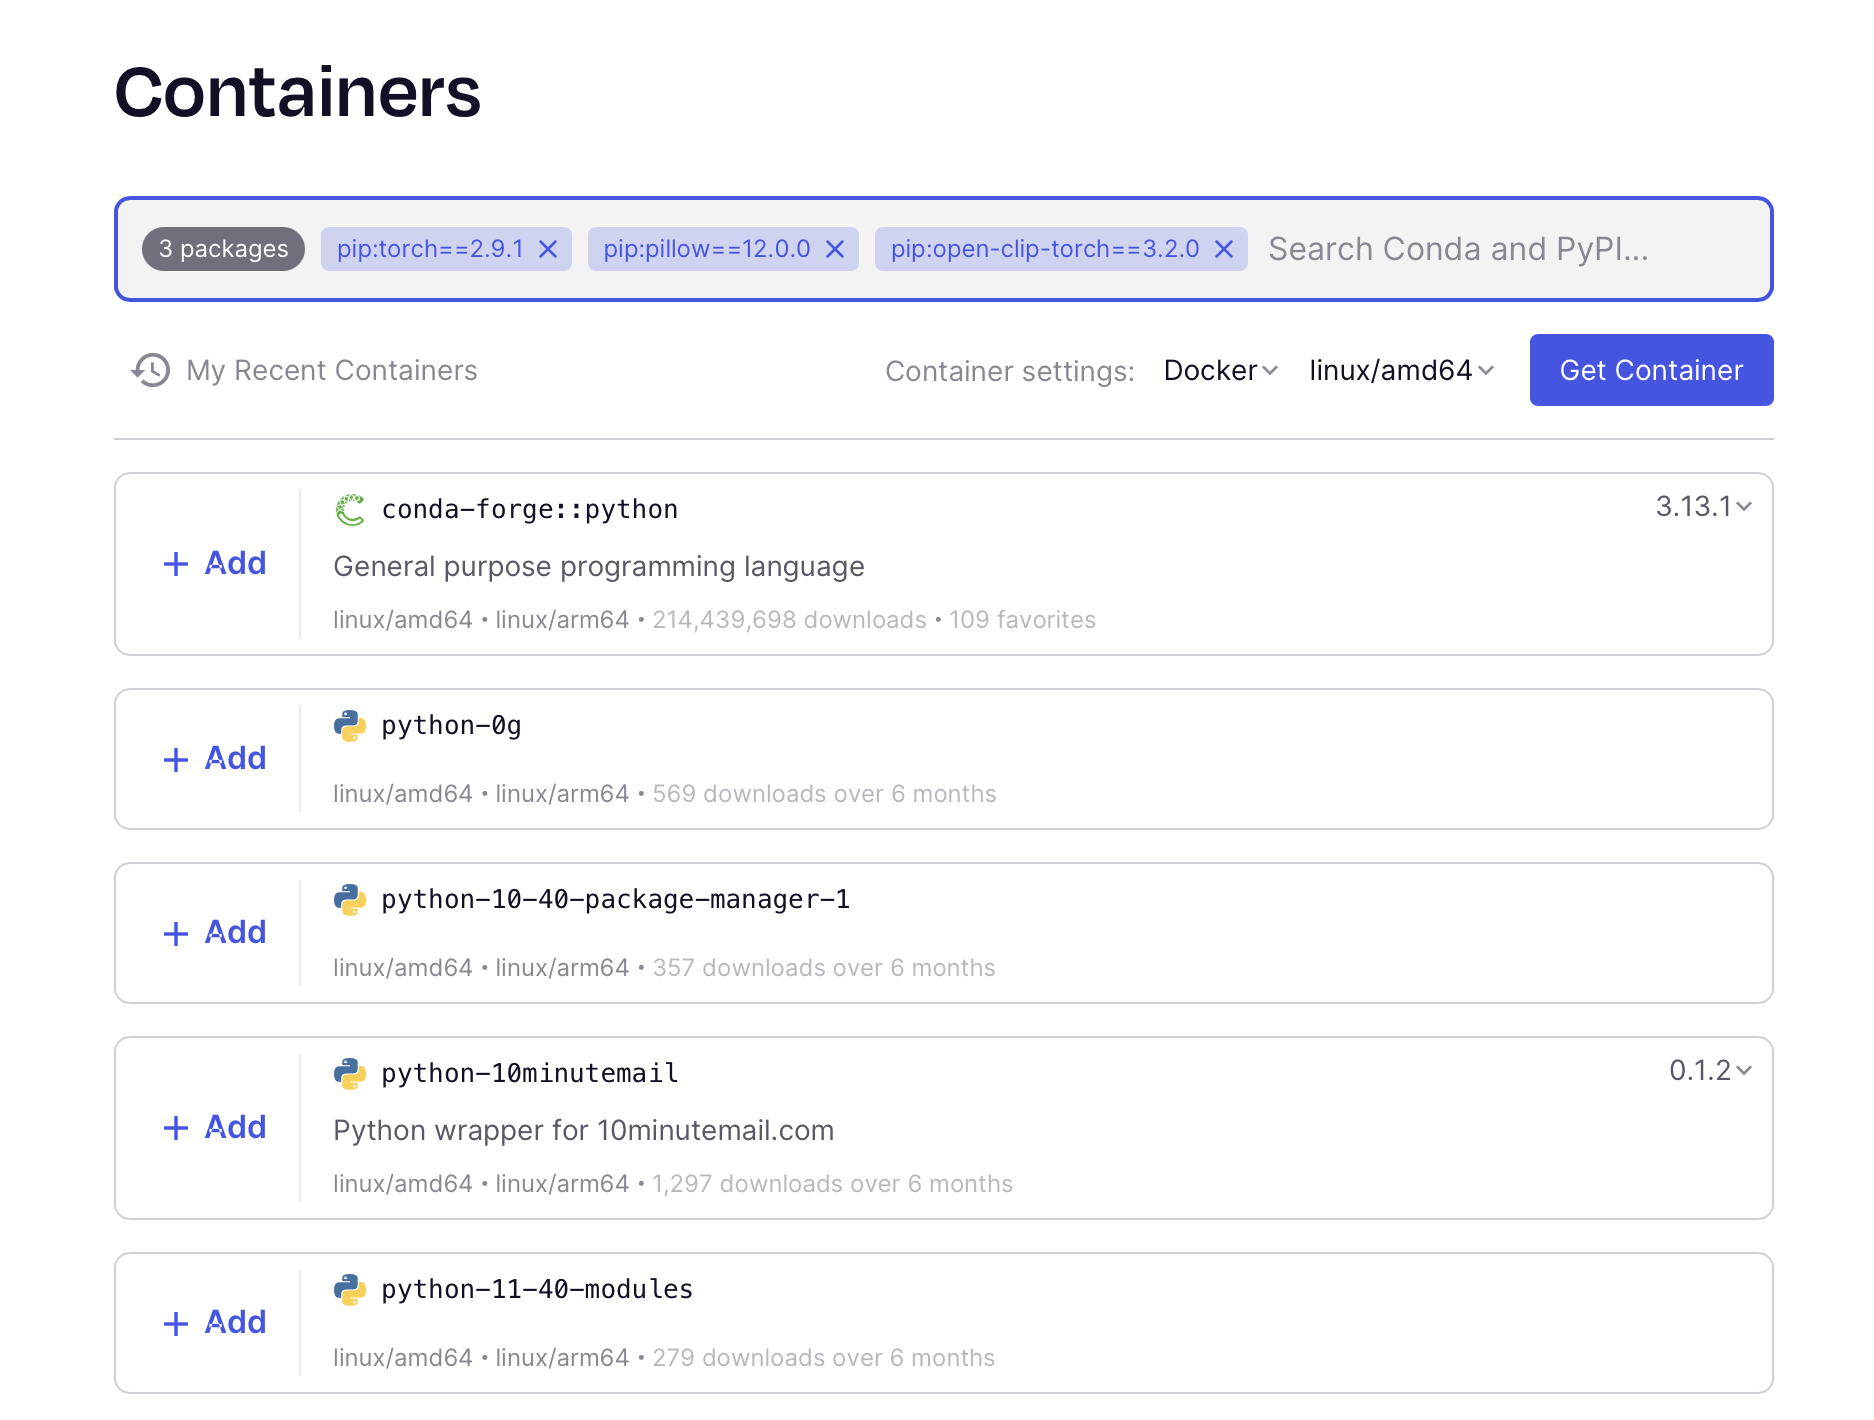
Our classify.py process includes three specific python packages (torch, pillow, and openclip-torch) at specific versions.
It's unlikely that there is an existing container that provides these specific packages.
We could opt to build our own.
There are a number of ways of building containers, but we'll use the Seqera Containers web interface. You can add multiple packages and it will build a container for you.
Once you have your container image, add it to the Classify process:
| Classify with custom container | |
|---|---|
5.3.5 Enable container execution
To actually use containers, you need to enable Docker (or another container engine) in your Nextflow configuration.
Create or update nextflow.config:
Now run your fully containerized workflow:
5.3.6 Takeaway
Containerization ensures your workflow runs identically across different computing environments by packaging all software dependencies.
5.3.7 What's next?
Let's explore advanced topics like version control integration and cloud execution.